During the holiday season, I love a simple handmade gift. My holidays are spent making handmade gifts for people I love, and my evenings are frequently spent working on projects while watching a Christmas special. For certain people on your list, you know you need to get a small item, but you want to give a gift with some thought and intentionality. These ornaments are the perfect solution and are on-trend. In two different styles, these ornaments have a neutral palette and can fit into any holiday decor.
Supplies:
- Copper or Metallic paint (I used fabric paint)
- White paint
- Hot glue gun
- Jute twine
- Foam paint brush
- Leftover coffee and coffee grounds
- Wooden letter (I purchased mine from Michaels)
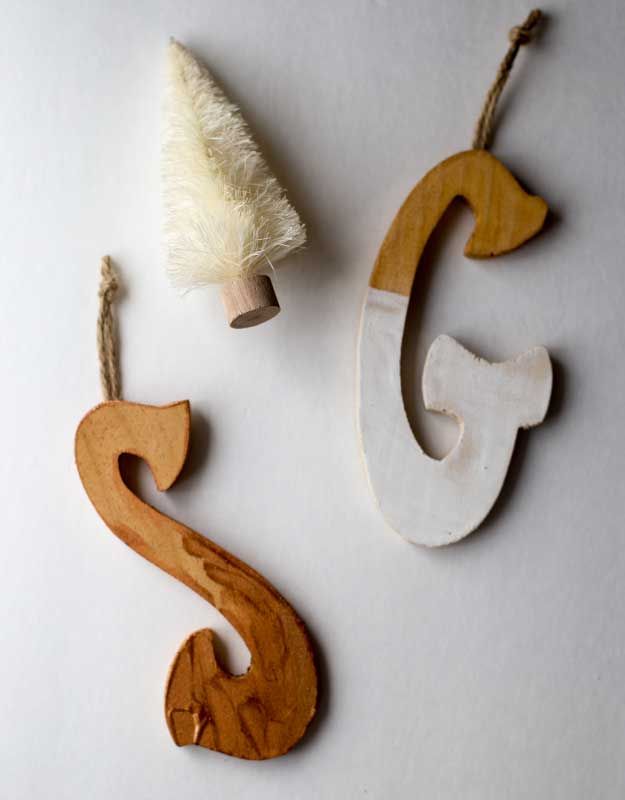
To begin, use a foam brush and leftover coffee to stain the letters. Once the first coat has dried, add an additional coat or until you have achieved the desired depth of color. Using your hand, add the grounds to the surface of the letter and rub in a circular motion. Cover the letter to achieve an antiqued look. Rub the excess grounds off after drying. Now there’s a clean surface to apply the paint.
For the copper letter:
For the copper letter, I wanted the paint to appear thick and textured, as if an artist had applied multiple coats of paint. Using my fingers, I applied the paint thickly at the bottom and spread less towards the top, creating a gradient effect.
For the white letter:
Tape the letter in half. Using a foam brush, apply a coat of white paint below the tape line. Once the paint is dry remove the tape. Use a small paint brush to refine the line from any paint that may have bled under the tape.
To complete the ornament, apply a dab of hot glue on the back and a knotted loop of jute twine.